A convincing launcher sound needs more than a big explosion. The initial shot, the weight of the blast, the incoming shell, and the air between events all do different jobs.
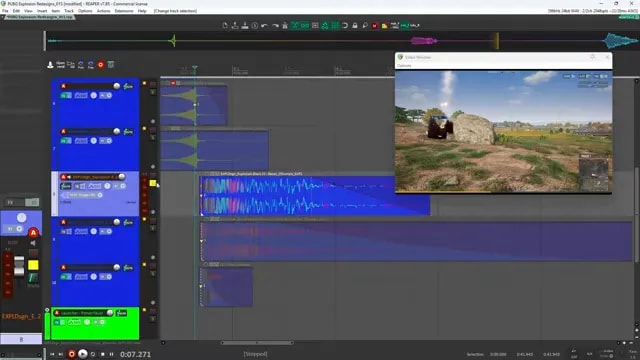
For these PUBG redesigns, I worked in Reaper on three sounds: a mortar impact, a Panzerfaust launch and distant explosion, and an M79 launcher. My goal was to get close to the originals using sounds from my Explosion SFX Pack 2: Blasts. There was one exception: I added a few mechanical sounds to the M79 because it needed them.
The main work was not piling on more layers. It was giving each layer a clear purpose, then adjusting its tone, transient, and position so it fit.
1. Mortar Explosion: Separate the Weight From the Attack
The mortar sound has two main events: an incoming shell followed by an explosion. I kept the incoming shell simple and spent most of the time shaping the blast.
Keep the incoming shell mostly untouched
The incoming shell recording already gave me what I needed, so I used it without processing on the individual layer.
On the bus, I used gain adjustment and a little limiting. The redesign was quite loud compared with the original, so I wanted to bring their levels reasonably close before comparing them.
Level matching matters. It makes it easier to judge the tone and impact instead of simply preferring whichever version is louder.
Give the three explosion layers different jobs
I built the blast from three sounds:
- Body and texture: A boomy, bass-heavy explosion that supplied the aggressive foundation.
- Attack and tail: A layer with a useful transient and a tail that helped carry the explosion.
- Upper attack: A layer shaped to bring out the higher-frequency part of the transient.
I trimmed some of the initial transient from the bass-heavy layer. I liked its weight and texture, but I did not want it defining the attack. The other two layers handled that.
This is a useful way to think about explosion layering: one sound does not need to provide the best attack, body, and tail. You can keep the part that works and make room for another layer to handle the rest. I use a similar approach in my thunder-to-explosion workflow, where the transient and tail are treated separately.
Reshape the upper transient
The third layer originally sounded quite bassy and close. I wanted it to contribute more definition than weight, so I used:
- Multiband processing to emphasise the high end.
- Recenter to make the wide source feel more directly in front of me.
- Spiff to bring out some of the midrange transient detail.
The unprocessed combination was loud and wide. The finished version was mainly a change in tone and positioning. I was not trying to completely transform every recording, just make the useful parts work together.
2. Panzerfaust: Build the Launch, Then Fill the Space
The original Panzerfaust sound has a short, clean launch followed by a lot of tail. Then there is a distant explosion, again with space around it.
My redesign ended up with a different character from the original. The main goal was to preserve that feeling of airiness and openness, as though the launch and impact were happening in a wide outdoor space.
Build the launch from attack, body, and air
I used three main layers for the launch:
- A bright transient layer: Enforcer added a little high-frequency fizz to the attack.
- The main shot: An edited explosion supplied the core launch sound.
- An air layer: A separate tail gave the shot a sense of space.
For the main shot, the source explosion had a middle section I did not need. I cut that section out, moved the tail forward, and blended it back into the attack.
That edit let me keep the useful beginning and ending without carrying all the material in between.
I then used Enforcer to add body and lift the top end, followed by a limiter to catch the peaks.
Shape the air layer so it survives the mix
The air layer originally had plenty of body and low end. Those were not the parts I needed. The main shot already supplied weight, so I removed a lot of the lows and brought the highs forward.
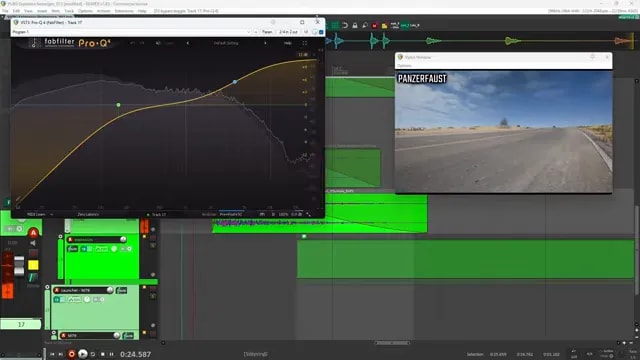
That brighter balance was deliberate. The air would be partly covered by the launch transient and the distant explosion. I wanted it to remain audible in the space between those events.
A layer can sound thin on its own and still be exactly right in the full design. Here, adding more bass would not have helped it do its job.
Give the distant explosion some character
For the impact, I chose a distant explosion with a slightly wobbling quality. It gave me the impression of sound bouncing off things.
It might not have been the most accurate choice for that particular environment, but I liked its character. I softened the high end so the initial transient felt farther away.
Then I added a separate punch layer and processed it with:
- Bassmaker to reinforce the low end.
- Recenter to bring the wide source into the centre.
- Transient shaping to sharpen the attack.
- Enforcer to add body to the snap.
This gave me a more defined impact without asking the distant tail to provide all the punch.
Use the impact air layer to control the sense of space
The distant explosion also had its own air layer. I shaped it separately:
- Cut some of the highs.
- Reduce an unwanted low-frequency peak around 90 Hz.
- Use Squash to bring out more of the upper detail.
Those moves served different purposes. I wanted to control the source’s tonal balance and remove unnecessary rumble, while still bringing forward the airy texture I liked.
In this design, that upper detail helped sell the impression of a larger, more open space. Removing the layer still left a usable explosion, but it lost some of that air.
I also adjusted its volume over time. Too much level at the beginning could make the impact feel closer. By pulling the start down, I could keep the initial explosion feeling distant and let the air become more apparent afterward.
Distance was not just an EQ decision. The balance between the initial hit and the following air changed how the whole event felt.
3. M79 Launcher: Balance Tone, Weight, Air, and Mechanicals
The M79 had a different set of priorities. The original was quite tonal, with sharp transients, and the launch had a strong smoky quality.
I aimed for two short, sharp attacks while making sure the air and smokiness came through. That meant building several distinct elements rather than relying on one large blast.
Start with body and an airy tail
The first launch layer provided both weight and a tail with some sense of space. Enforcer made it more aggressive and added a substantial amount of low end.
At one point, I also had Enforcer running on the bus. That was adding sub underneath the individual layers while I was checking them. Bypassing it helped me hear what each source was actually contributing.
This is worth remembering when you solo layers: bus processing can change what you think you are hearing from the source.
Create and tune the tonal click
The little tonal click came from Enforcer using a bass saw preset. I tuned it toward the original, then used several stages of processing to get closer to the character I wanted.
- Multiband processing shaped the frequency balance.
- Transient shaping helped the click pop out.
- Stereo processing widened a sound that initially felt very centred.
- Gain and pitch adjustments refined its level and tuning.
- Recenter was also part of the positioning chain.
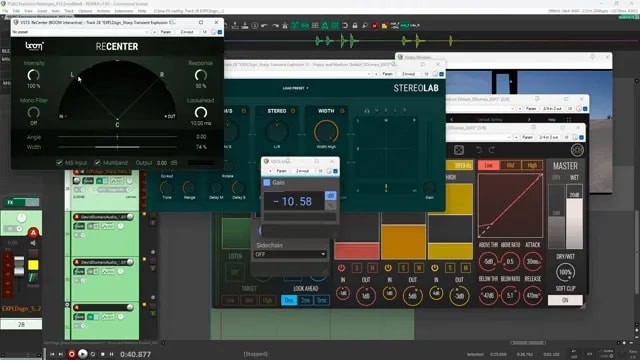
The point was not to make the tonal layer huge by itself. It needed to add that recognisable little high-end note while fitting around the heavier launch material.
Add a layer that feels like a projectile leaving a launcher
I wanted another layer to suggest a grenade or shell coming out of the weapon. This is a launcher, not just a gunshot, and I wanted that difference to come through.
Positioning it toward the centre helped it feel directly in front of me, alongside the main launch.
Use wide mechanical sounds where they help
The mechanical sounds were the exception to the explosion-library constraint. I added them because the M79 felt like it needed that detail.
I made them quite wide because the original had a wide mechanical component. When I narrowed them, they tended to disappear into the rest of the mix.
That gave the launch a useful contrast:
- Centred body and projectile detail kept the main event focused.
- Wide mechanical detail stayed audible around the core sound.
On the launch bus, Enforcer supplied extra sub weight. I followed that with EQ to control the bass because it was becoming excessive.
4. M79 Explosion: Keep the Bass in the Right Layer
The M79 impact used three main ingredients: a bass-heavy foundation, a shaped air and tone layer, and a burning texture.
Let the foundation carry the weight
The first layer was already very bassy. I added a little shaping to bring it forward, but the source worked reasonably well without it.
That meant I did not need the next layer to be equally heavy. Its role was to supply a different part of the explosion.
Clean up the air and tone layer
The second layer had useful air and tone, but too much bass and low-mid energy for this design. I cleaned it up in stages:
- Remove unwanted low end.
- Reduce a low-mid area around 260 Hz.
- Reduce another midrange area around 436 Hz.
- Use RX De-click to reduce crackling that became noticeable when I raised the level.
- Use Spiff to further reduce unwanted low-frequency transient content.
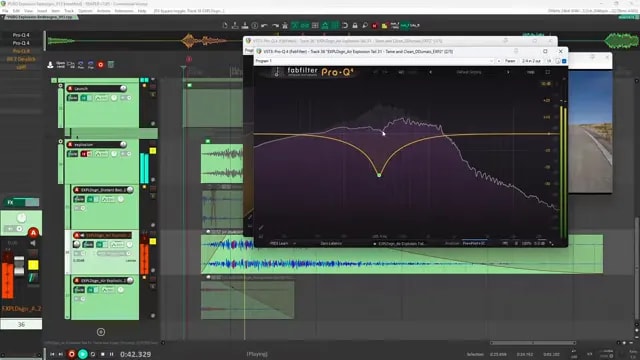
The 260 Hz and 436 Hz cuts were decisions for this particular recording, not fixed settings for every explosion. I was removing the parts that made this layer too heavy while keeping the texture I wanted.
The de-clicking was also practical. A little crackle might not stand out at a low level, but it can become distracting once the layer is brought forward.
Leave the burning texture alone
The final layer had a burning quality that fit the explosion. I added it without processing.
Not every layer needs an effects chain. If it already provides the right texture, there is no reason to complicate it.
Add the final punch on the bus
Once the layers were together, I used transient shaping and Enforcer on the explosion bus to give the impact more attack and body.
The difference was mainly in the punch. The underlying sound was already there; the bus processing helped it hit a little harder.
A Practical Way to Approach Launcher Sound Design
Across these three redesigns, the same approach kept coming up:
- Identify the important events. Separate the launch, incoming shell, impact, and tail before choosing sounds.
- Give every layer a job. Decide whether it supplies attack, bass, tone, air, mechanics, or texture.
- Edit before adding more processing. Trim an unwanted transient or remove an unnecessary middle section when that solves the problem.
- Keep low end where it helps. Let the foundation provide weight without making every supporting layer bass-heavy.
- Use width deliberately. A focused impact and wide supporting detail can work together.
- Shape the space after the hit. Air layers and their level changes can make a big difference to the sense of distance.
- Check the bus and compare at similar levels. Make sure extra sub, limiting, or gain is not hiding what the layers are doing.
These ideas also carry over to building explosions from less obvious sources, such as the jacket recordings in my foley-to-explosion sound design workflow.
The biggest takeaway is simple: a bigger explosion does not require every layer to sound big. A thin air layer, a small tonal click, or a wide mechanical detail can make the heavy layers feel more convincing because each part has room to do its job.