A short four second game clip can still be a great sound design test. This Indiana Jones and the Great Circle redesign was built in Reaper using custom field recordings, leather foley, brick footsteps, and a few focused processing choices.
The main goal was not to copy the original game audio perfectly. It was to take recordings from my own library, put them into context, and see whether they worked together as a believable game soundscape.
That is a useful habit when building sound libraries. A recording may sound great on its own, but the real question is whether it supports the environment, the character, and the action once it is placed in a mix.
Key Takeaways
- Build game sound redesigns with separate ambience, footstep material, and character foley layers.
- Tone shaping and high frequency control help custom recordings match a darker game environment.
- Widen ambience to protect the centre of the stereo field for character sounds.
- Impulse responses help dry recordings feel naturally placed within the same environment.
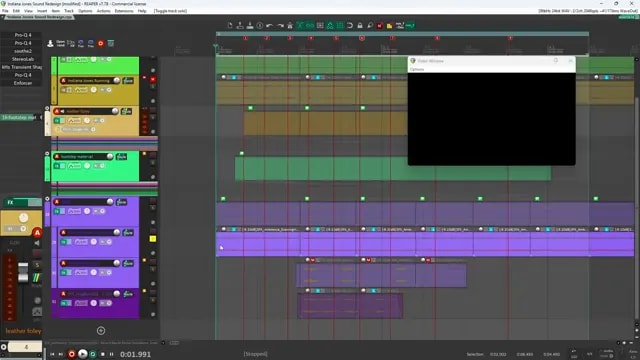
Build the Redesign in Three Layers
I approached this redesign with three main sound categories:
- Ambience: the environmental bed that creates the location and mood.
- Footstep material: the sound of boots contacting the brick or cement ground.
- Character foley: clothing movement, especially leather jacket detail.
Keeping these categories separate makes the work much easier. Each layer has a different job, so it should be processed differently. The ambience should create width and depth. The footsteps should communicate ground contact and weight. The foley should help sell the movement of the character.
This structure also makes it easier to evaluate your recordings. Instead of judging a sound in isolation, you can ask whether it works as ambience, character detail, or material interaction.
Start With the Background Ambience
The ambience is the base of the whole redesign. For this scene, I used an evening field recording captured while away from city noise. It already had a natural outdoor character, but it was much brighter than the darker, moodier tone of the original game clip.
So the first job was tone shaping.
Reduce Brightness and Control the Spectrum
The raw ambience contained plenty of high frequency detail. That can be useful in a recording library, but it did not fit the scene. I used EQ to cut high end energy and bring the tone closer to the reference.
Other processing focused on shaping the body of the ambience:
- Multiband compression to control and glue the frequency range together.
- Midrange shaping to bring out useful environmental detail.
- Low end control to prevent rumble from taking over the mix.
- Additional high frequency cuts to keep the ambience darker and less distracting.
This was not about making the recording dull. It was about removing the brightness that did not belong in the scene while keeping enough detail for the environment to feel alive.
Keep the Centre Clear for the Character
In a third person or first person game, the main character and important actions often live near the centre of the stereo image. If the ambience is also crowded in the centre, it competes with footsteps, clothing movement, dialogue, and gameplay sounds.
For that reason, I widened the ambience and pushed more of it toward the sides. I initially tested Stereolab, then settled on the Kilohearts stereo width control because it gave a better result for this sound.
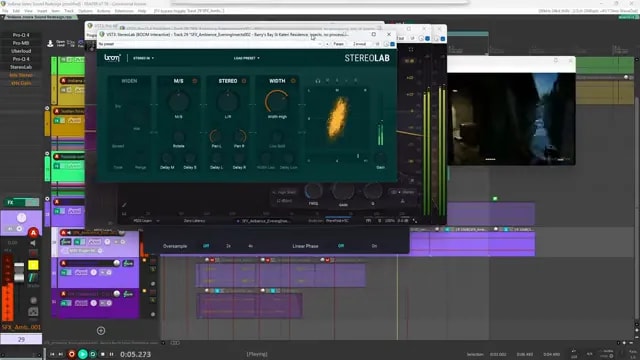
After the processing, gain matching helped keep the ambience balanced against every other layer. A wide environmental bed can make a scene feel larger, but it still needs to stay out of the way.
Add a Distant Dog Bark for Environmental Detail
Small background sounds can add a lot of life when they are used carefully. In this case, I added a dry dog bark recorded while walking a friend’s dog.
On its own, the bark sounded very close and centered. That was not right for this scene, so it needed two main changes:
- Move it off centre: Recenter was used to place the bark slightly toward the right side.
- Place it in a real space: Altiverb was used with an alleyway impulse response from Boom Library’s Fields and Spaces collection.
The dry and wet balance was pulled back so the bark stayed intelligible without becoming overly reverberant. The result was a sound that felt like it was coming from farther away, somewhere down an alley rather than directly in front of the player.
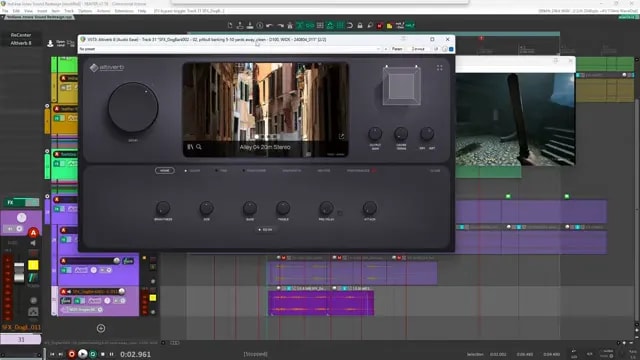
This is a simple but important lesson. A sound effect is not only about the recording itself. Positioning, distance, and environmental reflections can completely change the meaning of the same source sound.
Design the Character Foley With Leather Movement
The character foley layer was built from leather jacket recordings. The source material was usable on its own, but it was brighter and looser than the game reference.
The leather had some extra high frequency information from zipper and metal movement. Those small clicks can be useful when you want a detailed close-up sound, but here they were too noticeable.
Shape the Tone Before Adding Weight
The first steps were familiar:
- Use EQ to shape the overall tone.
- Use Soothe2 to control harshness in the high end.
- Reduce distracting zipper and metal clicks.
- Control low frequencies so the foley stays clean.
The bigger difference came from transient shaping. Compared with the game reference, my leather foley felt more washy. The attack, sustain, decay, and release were not tight enough.
A transient shaper helped make each movement more defined. The goal was to hear a clear initial impact while reducing the amount of tail that followed it. You still want the texture of leather, but the sound should not blur together with each footstep.
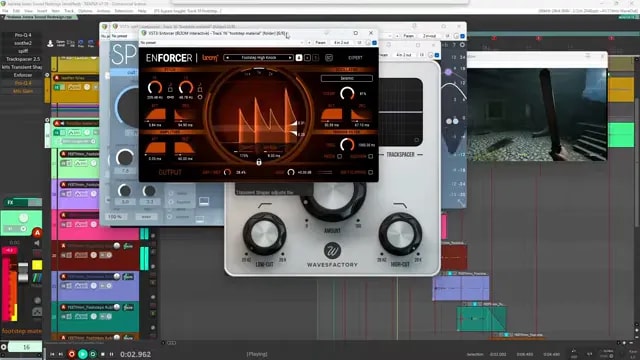
Finally, I added some low end weight and a bit of sub or footstep kick using Enforcer. That gave the movement more physical impact without needing to push the leather recording too loud.
Create Footsteps That Feel Like Brick and Cement
For the footstep material, I used recordings of walking on a brick or cement-like surface. Just like the ambience and leather, the source recordings had a lot of bright high frequency detail.
The processing followed the same general thought process, but it was focused specifically on clarity and impact.
Control Brightness and Clickiness
The first part was filtering and tonal control. EQ and Soothe2 helped tame the bright top end, while Spiff helped deal with clicky transient detail that was too sharp for the scene.
These tools were not used to remove every bit of texture. Footsteps need texture to communicate a surface. The point was to remove the distracting parts while keeping the initial contact clear.
Make Space for the Leather Foley
There was also a balance issue between the material layer and the leather movement. I wanted the leather to come forward more than the footstep material, so I used Trackspacer to make room for it.
That is an important mixing decision. Not every layer needs to be equally loud or equally detailed. In this redesign, the clothing movement was part of the character identity, while the ground material needed to support it without getting in the way.
Tighten the Transient and Add Weight
Again, transient shaping was used to emphasize the beginning of each footstep and shorten the tail. The initial attack needed to read clearly, while the sustain and release needed to stay controlled.
Enforcer added some extra low end weight afterward. This helped the footsteps feel more grounded and physical.
- Clear attack: makes each step readable.
- Controlled tail: prevents footsteps from becoming washed out.
- Added weight: gives the contact more body and impact.
What Could Improve the Redesign Further
As a quick redesign and a test of custom recordings, the layers came together well. But there was one clear improvement to make next.
The leather foley and footstep material could benefit from the same kind of environmental placement used for the dog bark. At this stage, they still feel slightly disconnected from the scene because they are relatively dry compared with the ambience.
Sending those layers through an appropriate impulse response in Altiverb would help them sit inside the environment. Even a subtle amount of environmental reflection could make the character sound more naturally connected to the alleyway and outdoor space.
This is why sound redesigns are such useful practice. They expose what is working, what feels disconnected, and which library recordings need more work before they are ready for a real project.
Use Redesigns to Test Your Own Sound Library
Recording your own sounds is valuable, but recordings become truly useful once they have been tested in context. A short game scene is enough to reveal whether your ambience has the right tone, whether your foley cuts through, and whether your footsteps have enough material detail and weight.
Build the scene in layers, match the tone to the world, keep the centre clear for important character sounds, and use spatial processing to put each element into the same environment.
If you need more raw material for game audio practice, you can grab the free video game sound design starter pack and start testing sounds in your own redesign sessions.