A massive, modern explosion sound effect does not have to begin with an actual explosion recording. It can start with something as ordinary as a winter jacket dropped on the floor.
The key is not the source itself. The key is how you layer it, shape it, add weight, create movement, and bring back the details that make the final result feel big and intentional.
Here is the full process I used in Reaper to turn a handful of simple jacket drops into a complex, punchy explosion sound effect.
Start With Simple Foley Layers
For this design, I recorded several drops of a winter jacket hitting the ground. These are very basic, soft foley recordings, but they have useful low frequency energy and a natural impact shape.
I loaded those recordings into S-Layer inside Reaktor. S-Layer is useful because it makes it quick to randomize layers, pitch shift them, and change their playback rate while experimenting.
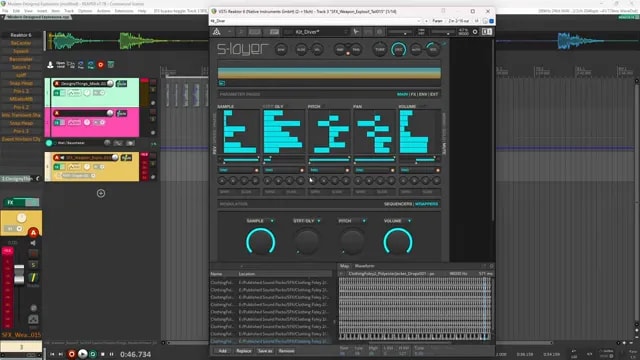
You do not need this exact setup. Reaktor is no longer being developed, and there are plenty of other ways to do this:
- Use another sample layering tool
- Use a sampler with randomization controls
- Manually stack foley recordings in your DAW
- Duplicate, pitch shift, and time stretch a few recordings by hand
The important thing is to build a small pool of variations. With several jacket drops loaded, each trigger can produce a different combination of layers, pitches, and playback speeds.
At this stage, the sound is not exciting. It is simply the raw material. That is perfectly fine. You are building a foundation that can become something much larger after processing.
If you want a repeatable approach for building sounds from basic source material, check out this sound design workflow for creating almost any sound effect.
Build the Initial Explosion Processing Chain
Once the foley layers were playing together, I processed them into a heavier, more aggressive impact. The goal here was to focus the sound, add body, emphasize transients, control noise, and create a more tonal result.
Keep the Sound Focused
The first processor was ReCenter. This keeps the sound focused rather than allowing important energy to feel too spread out.
After that, I added Squash to increase density and weight. Squash is a free Minimal Audio plugin, and it is useful when a source needs more impact and consistency.
Add Low End and Harmonics
Next, Bassmaker added more body. The jacket drops already had some low end, but Bassmaker helped make that foundation feel bigger and more useful for an explosion.
Saturn was then used to fill out the sound with saturation. This adds harmonics and thickness, helping a soft foley source feel less natural and more cinematic.
Bring Out the Transient
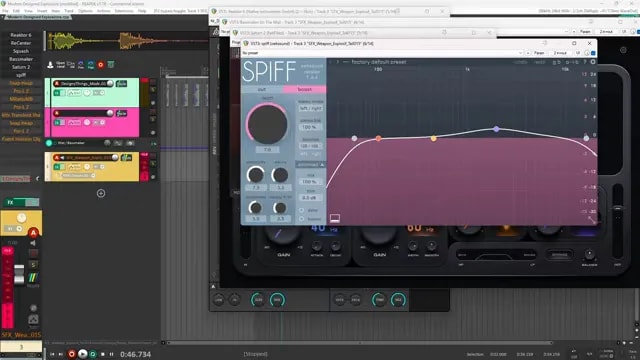
Spiff helped bring forward the fast transient detail. Explosions need a clear initial impact, and transient shaping is one of the tools that helps a sound read immediately instead of feeling dull or blurry.
I also used Snap Heap for additional distortion. This was done with parallel processing, so the original sound could retain some of its character while the distorted layer added density and aggression.
Control Noise While Keeping Tone
L2 helped push the overall sound forward, while MRatioMB was used to filter some of the noisy material in a more creative way. The purpose was not simply to clean up the sound. It was to reduce unwanted noise so the stronger tonal areas could stand out.
A Pro Limiter, more transient shaping, and another limiter helped make the impact more solid and present.
Use Audio Reactive Filters for Modern Shape
One of the most important parts of this stage was the filter processing. I used two different filters in parallel, each with a different filter shape. Both filters were modulated by an audio follower.
This creates movement that follows the sound itself. Instead of a static filtered impact, the filter response changes with the energy of the source. That is a powerful technique for getting those modern, designed impact and explosion textures.
Finally, a Horizon Clipper added a little clipping to further control peaks and increase perceived weight.
Route the Explosion Into a Granular Effects Channel
After building the initial explosion sound, I removed its master send and routed it into a separate processing channel. This keeps the core impact and the transformation stage organized separately.
The routed channel began with a filter to tame the low end before the more extreme processing. This matters because granular effects can exaggerate low frequency buildup quickly.
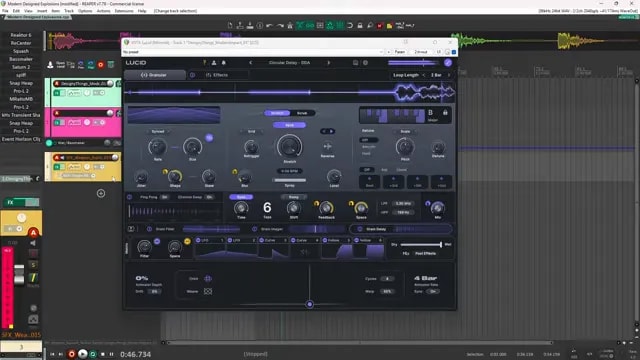
The main effect on this channel was Lucid by Minimal Audio, a granular effect plugin.
Use Granular Processing to Create the Explosion Tail
Lucid is where much of the transformation happens. I started with the Circular Delay preset, then adjusted it until it worked for this particular sound.
Granular processing can turn a short impact into a more complex burst of texture, movement, and tail. It takes the original material and breaks it into small grains, which can then be delayed, filtered, and spread across the stereo field.
The main adjustments were:
- Grain delay: Changed to control the timing and feel of the granular repeats
- High pass filtering: Reduced from the original preset so more low end could remain
- Delay settings: Adjusted to shape the tail
- Channel swap: Enabled for added movement
- Ping pong: Enabled to create stereo motion
The result is a much more animated and modern explosion texture. The sound no longer feels like a jacket landing on the floor. It has a designed tail with movement and depth.
Bring Back the Weight After Granular Processing
Granular processing can create great detail, but it can also remove some of the impact and low frequency body. After Lucid, the sound needed to be built back up.
First, I used Horizon Clipper again to bring back some density and control the peaks.
Then I added Bassmaker to restore the lower body that had been reduced by the granular effect. This is an important part of the process. Do not expect one effect to do everything. Sometimes an effect gives you exciting movement but takes away punch, so the next stage should solve that specific problem.
Finally, Quantum added high end clarity with a high shelf EQ focused around the transient area. That extra top end helps the explosion feel closer and more defined.
Randomize for New Explosion Variations
Once the chain is built, the fun part is generating variations. Randomizing the layers in S-Layer creates completely new source combinations each time.
Since the samples, pitch, playback rate, layering, saturation, filtering, granular processing, and stereo movement are all interacting, even small changes can produce very different explosion results.
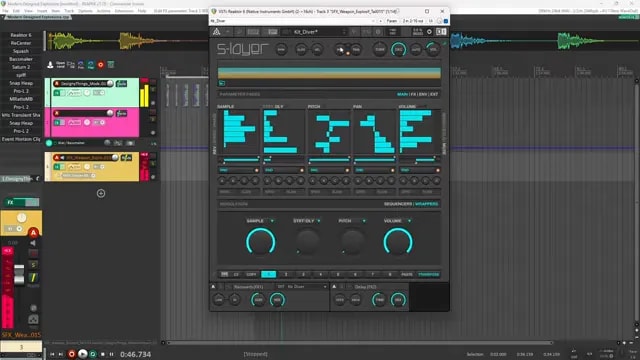
This is a great way to create a family of related sound effects for a game, trailer, cinematic sequence, or action scene. The sounds can share a common character without being identical.
Adjust the Tail Length and Texture
If you need a shorter, tighter explosion, go back into Lucid and adjust the granular settings.
The controls that matter most for tail design are:
- Grain delay: Controls how long the granular material continues
- Grain filter: Changes the tonal character of the individual grains
- Filter settings: Helps decide how bright, dark, thin, or heavy the tail feels
- Mix: Balances the transformed granular material against the original impact
- Feedback: Controls how much the effect sustains and repeats
For a more controlled result, reduce the mix and feedback. This keeps the impact strong while shortening the tail. For a longer, more stylized explosion, increase the delay and allow more granular texture to remain.
A Simple Recipe for Modern Foley Explosions
The complete idea is straightforward:
- Record or collect simple foley impacts with useful low end.
- Layer several variations together.
- Randomize pitch and playback rate to create variety.
- Focus and compress the source.
- Add body, saturation, distortion, and transient detail.
- Use audio reactive filtering to create modern movement.
- Route the impact into a separate granular processing channel.
- Use granular delay, filtering, channel swap, and ping pong for texture and tail.
- Restore low end body and high end clarity after the effect.
- Randomize the source layers to generate a library of variations.
The biggest takeaway is that simple recordings are often enough. A jacket drop may sound unremarkable on its own, but with the right layers and processing, it can become the foundation for a huge, modern explosion sound effect.
For more raw material to experiment with, grab the free video game sound designer starter pack.